How to replace the treadmill belt and deck on the Matrix T3X
Tools Needed: 4MM, 5MM, 6MM, and 8 MM Hex wrench and a Phillips screwdriver.
This video will demonstrate how to replace a belt and deck on a Matrix T3X treadmill. Though the video is specific to this treadmill it is very similar to most treadmills in the market.
1. Using a Phillips Screwdriver, remove the lower shroud and both end caps as seen in the video.
2. Next, using an 8MM hex wrench, remove the two rear roller bolts then remove the roller.
3. With a pair of pliers disconnect the drive belt tension assembly spring as shown in the video.
4. Use a 6mm Hex wrench to remove the two front roller bolts, and then remove the roller.
5. Now, with a 4MM hex wrench remove the side rail frames. There are two bolts on each of them.
6. Next remove the side rails. To do so you will need to move the rail back and forth until it is orientated over the mounts shown in the video. Once you do so, the rail will lift straight up off the unit.
7. Remove the deck bolts using a 5MM hex wrench. There are four on each side of the deck.
8. Slide the front roller out of the unit.
9. Grab the deck on each side and remove it and the running belt together.
10. Thoroughly clean the entire unit and both rollers. This step can dramatically extend or the life of a belt and deck. Not doing this can shorten the life significantly.
11. Install the belt onto the deck as shown in the video and then slide them in place on the unit and align the belt and deck with the holes in the frame.
12. Install the front roller. Make sure you install the drive belt. Center the belt on the front roller then start both of the front roller bolts. Once you have started both bolts, tighten them.
13. Install the drive belt tension spring.
14. Install the eight Deck bolts.
15. Install the rear roller and make sure that the end of the bolts goes through the hole in the frame for the roller alignment as shown in the video.
16. Now tension the rear roller. For more information on the belt tension process click HERE.
17. Re-install the side rails and rear roller cover frames.
18. Install the rear roller covers and lower shroud.
Additional Resources:
How to Align a Treadmill Walking Belt
One of the most commonly reported issues that treadmill owners run into is that of the walking belt gradually slipping off of one side of the track. This may lead to the belt feeling loose under your feet while running or walking. The dislodged belt may also be visibly set off to one side while the treadmill is in motion.
It's important to keep treadmill walking belts properly aligned for a number of reasons. For starters, if a belt becomes poorly aligned, it could actually pose a danger to the person using the treadmill. After all, a belt that's not properly aligned won't have the right amount of tension, which could lead to loosening and make walkers/runners more prone to slipping. Furthermore, if the belt isn't re-aligned, this could also lead to premature wear and tear on the machine itself. Fortunately, aligning a walking belt on a treadmill may be easier than you think; read on to find out how to perform this repair.
For Rear-Roller Adjusting Belts
Many treadmills have belts that can be adjusted using the rear roller, or the one furthest away from the controls of the machine itself. Therefore, it's important to note that this tutorial will focus only on rear-roller adjusting treadmills.
If the Belt Slides to the Right
If the walking belt has begun to slide off to the right side of the roller, use an Allen wrench to either tighten the bolt on the right side of the roller or loosen the bolt on the left side. Be careful, though. When tightening and loosening bolts, less is more. Perform only a quarter-inch turn at a time. Test your work by turning the treadmill on to its lowest possible setting. If the belt seems to be properly aligned, your work is done. If not, you may need to adjust further; just be sure to do so in small increments.
If the Belt Slides to the Left
If you find that the belt slides to the left of the roller while the treadmill is turned on, then you'll need to follow the same instructions above with one exception. Instead of loosening the bolt on the left and tightening the one on the right, you'll need to loosen the one on the right and tighten the one on the left. Maintain the same gradual, quarter-inch turns and check your work carefully.
Additional Resources:
How to Install The Schwinn Airdyne Wedge Pin
Installing the Schwinn Airdyne Wedge Pin
The following instructions for installing and removing wedge pins are applicable to Airdyne bike models AD3, AD4 and some Pro/Comp models. Each wedge pin has a flat edge that mates with a corresponding part. All parts that require a wedge pin will have a flat edge in one location. This allows the wedge pin to slide into position. To assemble the eccentric arm and cartridge, slide the eccentric onto the post of the cartridge, install the wedge pin and put the washer and nut on the back side.
Removing the Wedge Pin
To remove the wedge pin, use a wrench to loosen the nut at the top until there is a bit of play behind it. Use a rubber mallet to tap the top until the wedge pin begins to move down through the opening. Once the wedge pin slides easily, take the nut completely off the wedge pin and push the wedge pin out of the assembly. If the wedge pin has been installed on a machine for an extended length of time, it may be somewhat difficult to remove.
Installing Wedge Pins in the Proper Direction
When installing wedge pins during the crank arm assembly on Airdyne bikes it is important to be aware of the direction in which the wedge pins are installed. The crank arms on each side of the assembly should be at exactly a 180 degree angle from one another. It’s essential that the wedge pins on each side of the assembly are installed in opposite directions to ensure the crank arms are positioned correctly. If the wedge pin on the eccentric side has the nut up and the stud down, the wedge pin on the opposite side should be reversed.
Tightening the Assembly
Inside the nut, there is a nylon insert. The nut must be tightened sufficiently for the threads to grasp the nylon insert for it to hold properly. Proper tightening is accomplished by pushing the wedge pin in and starting the nut manually. Use a wrench to ensure it is thoroughly tightened. There should be no play in it at all. As a precaution, check the part after it has been installed for a while to verify that the nuts remain tight. If they are not seated properly, once the machine is in operation, they will begin to move. Even though the wedge pin may be seated correctly, if the nut isn’t tightened properly, there will be play between the moving parts that will cause the system to wear out prematurely.
Additional Resources:
How To Lubricate A Treadmill Deck Using Liquid Lube in 4 Easy Steps
Video about How to Lubricate a Treadmill using Liquid Lube
- To begin, clean the deck and belt by loosening the rear roller bolts 10 turns as seen in the video. It is best to loosen each side five turns and then repeat the process. Now that the belt is loose you can take an old towel and place it under the belt as shown in the video. Move the towel up and down the deck, then using your hands pull the belt around half way to ensure you have completely cleaned the back of the belt. Then remove the towel.
- Open your lube packet and use half of the package to make a half circle on the deck, from the front outer portion of the deck toward the center and then back to the outer edge. Use about half the package for this arc. Now repeat the process on the opposite side. Be sure to wipe up any excess oil as it is very slick!
- Use your hand to move the belt around some more to begin spreading the lubricant out.Now tighten the rear roller bolts back to the exact amount of turns they were loosened previously.
- Power on and start the machine and let it run slowly for a few seconds to make sure the belt is staying aligned in the center of the deck area. If it is not centered correctly, make minor adjustments to correct the issue. Tighten the left bolt to move the belt to the right and tighten the right bolt to move the belt to the left. Now walk on the belt for a minute or so to fully distribute the lubricant.
2014 Seasonal Flu is on the Rise
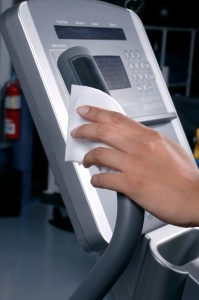
People who care about fitness should care about influenza. Seasonal flu is a serious problem every winter, and the current trends for the 2014 flu season show influenza on the rise. It can spread quickly anywhere a crowd gathers.
Even a light case of the flu can make life miserable for more than a week, spoiling work, workouts, and play. Yet it is possible to fight the spread of flu.
Protect your members from:
•Flu complications
•Flu downtime
•Lasting lethargy and sub-par performance
Health clubs and fitness centers are especially vulnerable to the flu, because the members all share the same equipment, and often everyone grabs it in the same place. Nobody wants to take the time to worry about germs, but they appear each flu season, and a swipe with a personal terrycloth towel will not wipe them away
The Problem
Germs spread easily where people spend time close together, and people can spread the flu and many other illnesses before they even feel sick. As the CDC says, “Most healthy adults may be able to infect others beginning one day before symptoms develop and up to five to seven days after becoming sick.” Flu virus survives on surfaces too, according to the United States Centers for Disease Control. Yet a few simple precautions will keep your gym from being “Where I got the flu.”
How do you fight influenza? Fitness helps people stay well, but so does hygiene. Providing wipes and towelettes shows athletes that you are looking after their health and safety, and protecting everyone from a disease that can spread like wildfire. Clean and sanitize all the surfaces your athletes touch, to look out for the members of your fitness facility.
The Solution
The three sanitation concerns for fitness facilities are exposed skin, hard surfaces, and soft surfaces. Sportsmith provides solutions for all three.
1. Anti-Bacterial wipes contain a gentle effective sanitizer especially formulated for use on the body. It smells effective but not strong, and dries quickly, leaving skin feeling fresh. Making wipes available is one easy way to prevent the spread of influenza and other infections among your members:
• Use on hands, arms and legs, wherever you touch equipment
• Safe and effective on facial skin
2. Disinfecting towelettes clean hard surfaces. They kill viruses, fungus and bacteria, including staph. This product is gentle enough to use without gloves, yet highly effective. Use on:
• Metal
• Plastics
• Laminates
• Rubber
• Plexiglass
Flu complications can include pneumonia, meningitis, and encephalitis. These are all rare. However, downtime from the flu is common. Influenza takes its victims out of action for up to ten days, and sometimes longer.
Even when someone gets over the flu, they may still not feel completely back to normal. It can take months before an athlete functions at peak again. Influenza and other viruses can really put a dent in performance.
Protect your members from the flu and many other contagious diseases, and keep your facility sparkling. Take care of your members, with economical body wipes, towelettes, and cleaning wipes from Sportsmith. Your members will know you care.
Additional Resources:
New TRIO QR® and the TRIO® Pedals!
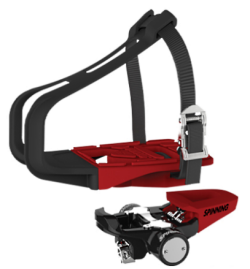 Sportsmith is proud to now carry the TRIO QR® and the TRIO® Pedals!
TRIO QR®’s “Quick Release” design makes it that much easier to quick change between riding with
everyday shoes, LOOK® or SPD® cleat connections. With a push of a button riders are able switch which pedal style they need. Both TRIO QR® and the TRIO® Pedals come in threadless (Morse Taper) or standard thread…. Yes, that means they fit on any indoor cycling bike! Spinning has truly out done themselves with these designs. Whether you choose the “Quick Release” or not your members will enjoy the benefits that both TRIO® Pedals provide. With the over-sized commercial grade pedal spindles
and sealed bearings you will love these pedals just as much as your club members!
Spinning recommends the following threads for specific bikes:
- Threadless (Morse Taper) pedals recommended for Spinner® Blade, NXT, NXT-SR, and steel frameeSpinner
- Threadless pedal only fits 2012 (or later) model year Spinner bikes manufactured by Star Trac
- Standard Thread pedals recommended for Spinner® Pro and non-Spinner brand indoor cycling bikes
So what makes these new pedals so special?
- They easily accommodate other non-cycling shoes with their snap-in pedal platforms.
- They can easily be removed from a platform due to the patented quick release levers.
- They also adapt to SPD® and Look® Delta cleats.
- Added durability means over-sized commercial grade pedal spindles and sealed bearings to keep you logging miles.
New Sportsmith Spring Catalog 70 and Training Catalog
 Hot off the press is the new Sportsmith Fitness Parts & Products Catalog along with the Sportsmith Fitness Training & Conditioning Catalog and we have the inside scoop on what’s new! First off you have to check out the Smart Phone App Tag Feature! Throughout the catalog we have tags for videos, tutorials, error code messages, and articles to help make maintenance just a bit easier!!!
Find newly featured replacement parts for the LifeFitness Seated Leg Curl model FZSLC and model PSSLC. Also new to the Sportsmith catalog are replacement parts for CYBEX bikes 625R & 625C.
Here's a list of some of the new products we're excited about and featured in the new catalog!!
- Wooden and Steel Gymnastic Rings with 18’ Straps
- 3-in-1 Plyo Box Unassembled
- Black Heavy Training Rope 1-1/2” x 30’ (we also have 40’ and 50’)
- Sportsmith Medicine Balls 6lb-25lb
- Glute Ham Developer, GHD
- Squat Stand
- Ab Dolly
- Yoga Bolsters
- Wool Yoga Blanket
- Yoga eQua Mat Towel by Manduka
- Power Sled
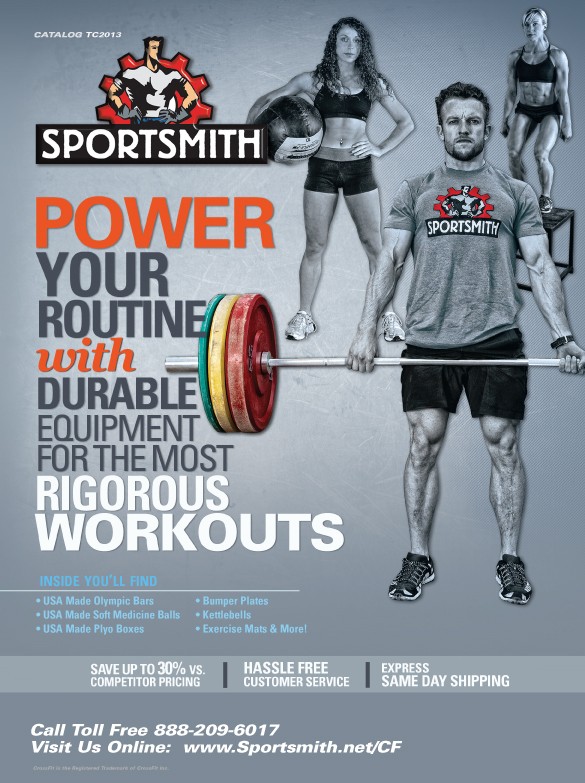
Can't find a part or product you need in our catalog? Don’t forget to check out www.sportsmith.net or call 800-713-2880 for a complete list of parts and products offered by Sportsmith.
Star Trac: StairMill – How to check Battery Drain and Adjust Chain Tension
Having a problem with you Star Trac StairMill battery draining and the unit not powering up? It’s possible that you have too much tension in the chain system.
Below is a summary of the video above, "Star Trac: E-SM - Battery Drain and Chain Tension" by Star Trac.
- Perform weight test. This will allow you to verify if there is too much tension.
- Check chain tension. There should be a 25mm-32mm gap between the Idler Pulley and the chain.
- If the gap is less then 1 inch you will need to Adjust the Idler Pulley Gap.
- Loosen both right and left side pillow blocks.
- Make an adjustment on the set screws using an Allen key. The brackets on the right and left side should be the same. Tight pillow blocks back.
- Measure chain sag.
- Place a straight edge across the top and bottom bearing.
- Measuring the amount of sag from the bottom of the straight edge to the top of the chain there should be ¾”(19mm).
- Adjusting the Chain Tension for the Correct Amount of Sag.
- Loosen pillow blocks on both the right and left side of the bottom pulleys.
- Back out set screws. (Equal amount on both sides).
- Before checking sag tighten pillow blocks on both sides.
- Should have a ¾”(19mm) gap on both right and left sides.
- Perform weight test again. Double check the sag measurements and make corrections if the steps still do not move.
- Test the StairMill before putting the shrouds back on the machine.
For Star Trac Replacement Parts click here.
Best of IHRSA 2013
IHRSA 2013
What could be more exciting than getting a sneak peak on what’s to come in the Fitness World?!! This year at IHRSA all the fitness products and equipment were nothing short of amazing! The only bad thing is we wish we could have stayed longer!
First we got to start off our trip at the Stairmaster 30th and Schwinn 10th Anniversary party. It was great to mingle with some wonderful people in the fitness community! It was great listening to the speakers and having some alumni there to check out how far the Stairmaster has come after 30 years! Did you know that Sportsmith is Stairmaster and Schwinn’s authorized product support center? Yup! So give us a call if you have any questions!
We started our morning off right with an early morning workout by Xerciselab. We checked out the Build Lab class. This is a workout that uses your body weight as resistance. My thighs are still burning from all the squats!
Then we were off to the trade show floor. Oh the smell of new equipment… Ok, maybe it was the Chobani Greek Yogurt we were smelling... Still amazing! We were in awe of all the new technology that has come out for the new equipment. A hot new product we loved? The Grid Mini by Trigger Point- we may not leave home without one now. I was dying to lie down and try it out along with the ColdRoller. Unfortunately the Grip Mini is not available until April. We were also able to hop onto Star Trac’s new TreadClimber®- love it! Some popular items this year seem to be surf board workouts (SURFSET Fitness, FreeMotion Fitness, and StrongBoard Balance), Suspension training (TRX, Jungle Gym XT) and different functional training stations (SYNRGY 360T by LifeFitness and CT8 Fitness Training System by Tuff Stuff Fitness).
We had a wonderful time checking out the new equipment and can’t wait to get some new stuff in stock!
Click on the links below for video from the show.
Bowflex Parts
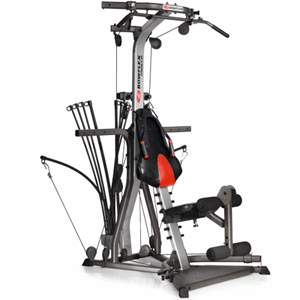 For all of you Bowflex lovers out there we have some great news for you!!
Sportsmith is proud to announce that we are now carrying Bowflex Replacement Parts. Did you think Sportsmith would let you get away with not working out because a rod cable was broken on your Bowflex? We don’t think so!! Dust off those machines because we have some great new parts in stock for Bowflex. They are at a great low price too! The parts we have in stock are for the following models:
- Bowflex Home Gym Parts
- Bowflex Benches
- Bowflex Dumbbells
- Bowflex Elliptical Parts
- Bowflex Max Trainer Parts
- Bowflex Treadclimber Parts
We have several different ways to help you get the right Bowflex parts you need. You can check out the manual or parts diagram for your specific Bowflex home gym by clicking the links above. Call us directly at 888-713-2880 for customer support and we would love to help you find your part!
